You may be interested in…
Your cart is currently empty!
Sales & Support: (800) 674-6054
★★★★★
“I’m so glad I found you!”
“Easy decision”
“For all the reasons”
“Free generosity!”
“Finally took the plunge!”
“What I didn’t know I needed”
“Such a personal experience”
“Total no-brainer”
“A win win win”
“This company, though”
“Love this so much”
“Like family helping family”
“People helping people”
“Above and beyond”
“Brilliant alternative”
“Easy, quick, no-regrets”
“Awesome way to buy”
“Simply the best”
“Makes perfect sense”
“Feels like home”
“The real deal”
Congratulations on your new Vitamix blender! You’ve just invested in a powerful, versatile kitchen tool that will open up a world of culinary possibilities.
From silky-smooth soups to refreshing smoothies, homemade nut butters to delectable sauces, your Vitamix is ready to revolutionize your cooking and help you embrace a healthier lifestyle.
To get you started on your blending journey, we’ve curated a list of seven essential Vitamix recipes that showcase the machine’s capabilities and deliver delicious results. These recipes are perfect for beginners and experienced users alike, and they’ll give you a taste of the many ways you can put your Vitamix to work in the kitchen.
Get ready to blend, sip, and savor your way to a more vibrant, nutritious way of eating with these must-try Vitamix recipes.
Green smoothies are a fantastic way to start your day or power through an afternoon slump. Packed with nutrient-dense leafy greens, sweet fruits, and a creamy liquid base, these invigorating blends offer a delicious way to boost your intake of vitamins, minerals, and fiber.
The Vitamix’s powerful motor makes quick work of even the toughest greens, ensuring a smooth, lump-free texture that’s a pleasure to drink. Our go-to green smoothie recipe combines the goodness of spinach and the natural sweetness of bananas and mangoes.
This green smoothie is great for beginners and is flexible for making adjustments. Let’s dive into the recipe and discover just how easy it is to incorporate this healthy habit into your routine with your Vitamix blender.
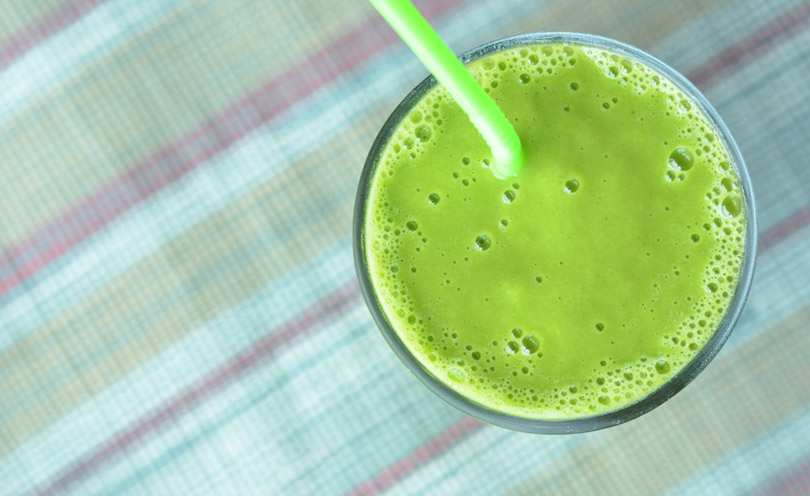
Recipe:
Next up is a whole food green juice. Our signature green juice recipe is a refreshing, nutrient-packed blend that offers a unique twist on the classic green smoothie. While smoothies are excellent for meal replacements, a whole food juice provides a concentrated boost of vitamins, minerals, and antioxidants in a lighter, more easily digestible form. The key difference lies in the consistency and use of the blend. While a green smoothie is more of a one-time treat, green juice is something we aim to always have ready-made in the fridge.
By using your Vitamix to create a whole food juice, you retain all the beneficial fiber from the ingredients, setting it apart from traditional cold-pressed juices made with a slow juicer. The fiber in whole food juices helps regulate blood sugar levels, preventing the insulin spikes often associated with fiber-free juices. Plus, most people don’t consume enough fiber in their diets, and this green juice recipe offers an easy way to boost your daily intake.
Our green juice recipe starts with a base of water, followed by a nourishing mix of greens, fruit, seeds, lemon, and ginger. We top it off with frozen mango for natural sweetness and a handful of ice to cool the blend and guide all the ingredients into the blade. The result is a smooth, vibrant juice that’s perfect for sipping any time you need an energizing pick-me-up. Get ready to experience the revitalizing power of whole food juicing with this delicious and nutritious green juice recipe.
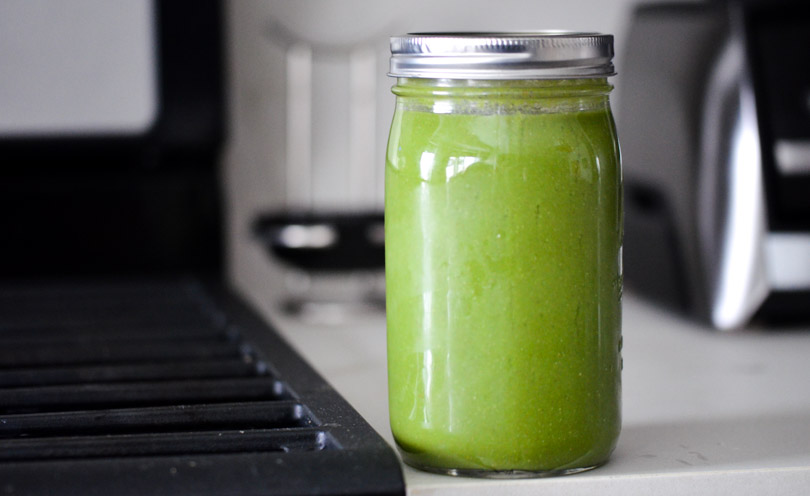
Recipe:
Method: Blend for 60 seconds on variable speed 10. Then blend for 60 seconds on variable speed 1 (to get the bubbles out).
Video: Watch the Vitamix Green Juice video tutorial!
Get ready to experience a whole new level of comfort food with our elevated Vitamix tomato soup recipe. This innovative approach to a classic favorite showcases the versatility and power of your Vitamix blender, transforming cold ingredients into a steaming bowl of deliciousness in just six minutes.
Traditional tomato soup recipes often require simmering on the stovetop, but with the Vitamix, there’s no need for cooking. The blender’s high-speed blades generate enough friction to heat the ingredients, taking you from raw vegetables to a piping hot, silky-smooth soup in a matter of minutes.
Our tomato soup recipe starts with a mix of ripe, canned, and sun-dried tomatoes, then adds a carefully curated blend of aromatic herbs, savory spices, and your choice of milk for richness. The result is a complex, satisfying soup that’s bursting with flavor and warmth – a far cry from the plain, one-note tomato soups of your childhood.
Not only does this recipe save you time and effort in the kitchen, but it also highlights the Vitamix’s ability to create hot, nourishing soups without the need for additional appliances or cooking methods. Experience the magic of friction cooking and elevate your tomato soup game with this must-try Vitamix recipe.
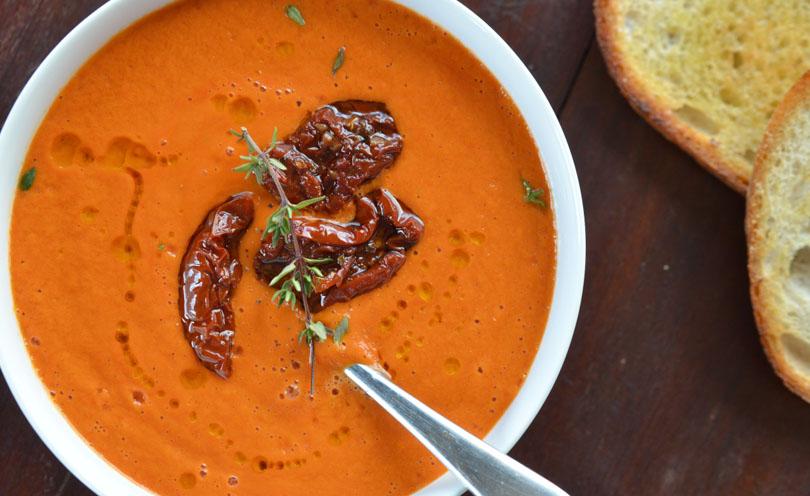
Recipe:
Discover the awesomeness of making your own homemade peanut butter with your Vitamix blender. This simple, one-ingredient recipe yields a fresh, all-natural spread that’s better than anything you can find on store shelves. Free from preservatives and packed with real peanut flavor, homemade peanut butter is a game-changer.
Creating one-ingredient in your Vitamix couldn’t be easier. Start with four cups of roasted, unsalted peanuts. While you can use raw peanuts, roasted ones will make the process even smoother. If you prefer a hint of saltiness, feel free to use salted peanuts instead.
Once you’ve added the peanuts to your Vitamix container, securely fasten the lid and keep your tamper handy. Quickly ramp up the speed from variable 1 to 10, or use the “nut butters” setting if your model has one. It’s crucial to ensure your blender is running at its highest speed, as this activates the cooling fans and allows your machine to handle the thick mixture with ease.
As the peanuts blend, use the tamper to push them down into the blades, ensuring a consistent texture. The noise may seem intense, but rest assured, assuming you’re using high speed, your Vitamix is built to handle this task. You’ll know the peanut butter is ready when you hear a distinct chugging sound, indicating that the mixture is spinning freely.
Once you reach this stage, let the peanut butter blend for about 10 seconds before turning off the machine. Avoid running the blender for too long after achieving the desired consistency, as it can put unnecessary strain on the motor.
Embrace the power of your Vitamix and the simplicity of this homemade peanut butter recipe. With just a minute of your time and a single ingredient, you’ll have a jar of fresh, creamy peanut butter that will elevate your sandwiches, snacks, and baked goods to new heights. And once you’ve mastered this technique, the sky is the limit for creating unique peanut butter flavors inspired by different cuisines from around the world like Thai-inspired Panang Peanut Butter or our kid-friendly Monkey Butter.

Recipe:
Method:
Using the tamper, blend on high speed until desired texture.
Video: Vitamix Peanut Butter: Surprisingly Quick and Easy!
Indulge in the ultimate chocolate ice cream experience with this irresistible Vitamix recipe. While it may not be the simplest ice cream recipe for your blender, the rich, creamy texture and deep, satisfying chocolate flavor make it well worth the effort.
Our chocolate ice cream recipe relies on the classic Vitamix technique of blending frozen ingredients at high speed while using the tamper to achieve the perfect consistency.
We start with a base of brewed coffee, which enhances the chocolate flavor without overpowering it. Not to be concerned — you cannot taste the coffee and you can use decaf or substitute with water if you’d like. Dark chocolate chips, cocoa powder, and a touch of salt intensify the chocolate taste, while vanilla adds a subtle aromatic note. Dates provide natural sweetness, and raw cashews contribute to the ice cream’s creamy texture.
The secret ingredient in this recipe is full-fat canned coconut milk, which we freeze into cubes before blending. This step ensures a thick, luscious consistency that rivals traditional dairy-based ice creams.
To create this masterpiece, we first melt the chocolate chips with coffee, then add the cocoa powder, salt, and vanilla. This mixture is blended with the dates and cashews until smooth, then allowed to cool slightly. Finally, we add the frozen coconut milk cubes and ice, blending on high speed while using the tamper to push the ingredients into the blades.
The result is a scoopable, velvety chocolate ice cream that will make your taste buds sing. Serve it in your favorite dish, snap a photo, and share your creation with the world. This Vitamix chocolate ice cream recipe is proof that with a little effort and the right ingredients, you can craft an ice cream experience like no other.
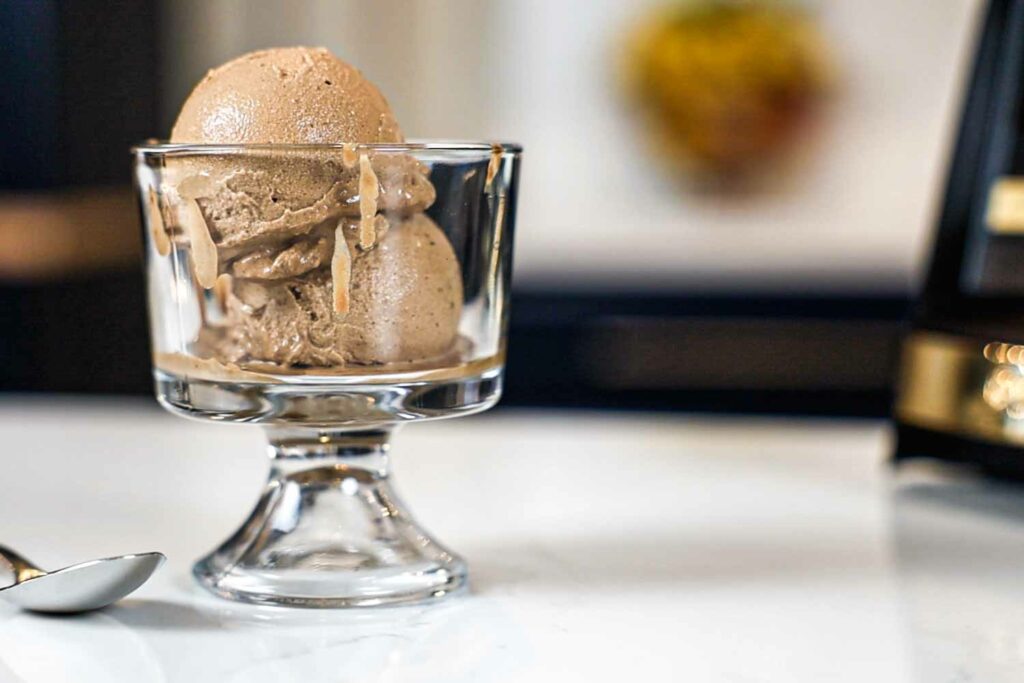
Recipe:
½ cup brewed coffee
½ cup dark chocolate chips
2 Tbsp. cocoa powder
¼ tsp. salt
½ tsp. vanilla extract
¼ cup dates (pitted)
½ cup raw cashews
1 cup canned coconut milk, full-fat, frozen in to cubes
4 cups ice
Method:
PREP: Measure 1 cup of coconut milk and freeze into ice cube tray overnight.
CHOCOLATE: In a small saucepan add the coffee and chocolate chips. Heat on low while stirring until almost smooth. Turn off heat. Add cocoa powder, salt, and vanilla. Stir until smooth.
BLEND: Pour the warm chocolate mixture into the Vitamix container. Add the dates and cashews. Ramp from variable speed 1 to 10
Blend on high for 60 seconds until smooth. Let cool for 10-20 minutes
ICE IT:Add coconut milk cubes and ice to the cooled mixture. Blend on high for 30-60 seconds. Push ingredients with the tamper from the corners into the blade until smooth.
Video: Watch the 3-minute video tutorial of this Vitamix Chocolate Ice Cream Recipe
Prepare to be amazed by our “Cashew Queso” recipe – the most popular and versatile dish in our Vitamix collection. This plant-based cheese sauce has taken the culinary world by storm, delighting both dairy-free enthusiasts and cheese lovers alike with its creamy texture and irresistible flavor.
The magic behind this recipe lies in the Vitamix’s ability to transform cold ingredients into a piping hot, silky-smooth queso in just six minutes. By harnessing the power of friction cooking, the blender’s high-speed blades heat the mixture to perfection, eliminating the need for any stovetop preparation.
Our Cashew Queso is a true crowd-pleaser, suitable for a wide range of occasions. Serve it as a dip alongside tortilla chips or fresh vegetables for a satisfying snack or appetizer. Use it as a topping for sliders or tacos to add a creamy, cheesy element to your favorite meals. Or, treat your kids to an easy, wholesome dinner by giving them a cheesy dip for dunking their choice of veggie sticks.
The beauty of this recipe lies in its simplicity. With just a handful of ingredients – almonds, cashews, a red bell pepper, and a blend of seasonings – you can create a queso that rivals any dairy-based version. The nuts provide a rich, creamy base, while the red bell pepper adds a subtle sweetness and vibrant color.
Whether enjoyed hot straight from the blender or chilled for a cool, refreshing dip, our Cashew Queso is sure to impress. It’s the perfect dish to bring to potlucks, ensuring that everyone, regardless of their dietary preferences, can indulge in a tasty, satisfying treat.
Don’t just take our word for it – countless Vitamix owners have shared that this Cashew Queso recipe alone was the reason they invested in their blender. Experience the magic for yourself and discover why this plant-based queso has become a true sensation in the world of Vitamix cooking.

Recipe:
Method:
Blend on high for 6 minutes (or use pre-programmed ‘Soup’ setting).
Fun fact: Whenever we stream a multi-recipe Vitamix demonstration video, we begin with hot queso as the cold open!
Who doesn’t love pancakes? Revolutionize your weekend breakfast routine with our healthy Vitamix pancake recipe. These delectable, dairy-free pancakes offer a nutritious twist on a classic favorite, providing a satisfying meal that won’t leave you feeling weighed down.
The secret to these wholesome pancakes lies in the use of old-fashioned oats, which we transform into a nutrient-rich oat flour using the power of your Vitamix blender. This gluten-free alternative to traditional white flour is packed with fiber, keeping you feeling full and energized throughout the morning.
To create a light and fluffy texture without the use of eggs, we turn to aquafaba, the miraculous liquid found in a can of chickpeas. This versatile ingredient acts as an excellent egg replacement, providing the perfect binding properties for our pancakes. As a bonus, after you strain the aquafaba from a can of chickpeas, throw them in your blender container with a few other on-hand ingredients to make hummus – a tasty and waste-free solution.
Our recipe also features the natural sweetness of ripe bananas and dates, eliminating the need for refined sugars. A touch of cinnamon adds a warm, comforting flavor while acting as a faux sweetener, further enhancing the pancakes’ delightful taste.
To prepare these healthy pancakes, simply combine rolled oats, a peeled banana, unsweetened milk of your choice, aquafaba, baking powder, cinnamon, vanilla extract, and pitted dates in your Vitamix container. Blend until very smooth — the more the fluffier — then either fold in a handful of fresh blueberries or place on top while cooking for an extra burst of flavor and nutrients.
While our version of healthy pancakes is a fantastic starting point, feel free to experiment with the recipe to suit your preferences. Try incorporating different flours, such as almond or coconut, or use a traditional egg as a binder if desired. The possibilities are endless, and your Vitamix blender makes it easy to customize your perfect pancake mix.
Treat your family to a special weekend breakfast that combines indulgence with nutrition. These healthy Vitamix pancakes prove that you don’t have to sacrifice flavor for wellness, offering a delicious and guilt-free way to start your day.
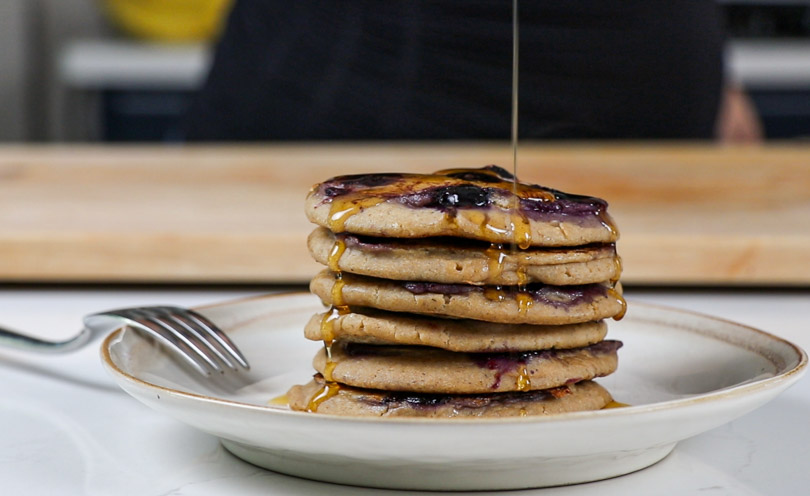
Recipe:
Method:
Heat and lightly grease a large pan or skillet to medium/low heat. Add ingredients in order listed to Vitamix container except for blueberries. Blend on high speed for 30 seconds. Add 1/4 cup of pancake batter to pan. Spread batter out in circular motion. Add blueberries onto cooking pancakes. Gently flip after a couple minutes (when bottom-side is browned or when you see bubbles). Cook another couple of minutes until cooked through. Serve with real maple syrup and enjoy!
Video: The Wholesome Blender Pancakes That We Make Every Weekend